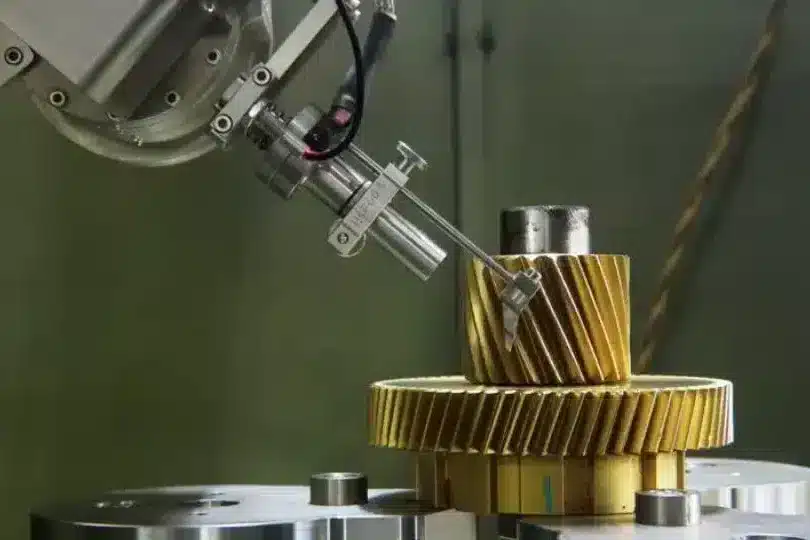
We provide single and serial inspection of your components for surface defects and near-surface defects using eddy current testing.
Eddy current testing is used to detect defects on the surface and near-surface defects in the material.
Cracks
From 0.05 mm to 0.15 mm crack depth, very dependent on usable frequency and materia.
The material to be tested must be electrically conductive.
Eddy Current (ET) testing is a method of surface crack testing on electrically conductive materials. Less common is its use for volume testing, which only works for special materials such as austenite. Eddy current testing uses electromagnetic induction to detect surface defects and near-surface defects. This method of non-destructive materials testing uses magnetic fields to generate electromagnetic currents in the component. These currents flow in small circles, which is why the method is called eddy current testing. Defects in the material change the course of these eddy current lines, allowing defects to be detected.
VOGT NDT is your partner if you need help with an eddy current inspection. Thanks to many years of experience, we can perform eddy current tests quickly, reliably and, of course, at your site. Larger series can also be tested by us at low cost in our VOGT Test Center. Thus, VOGT has an ideal solution for all applications to help you to fulfill your testing requirements. Like every testing method we use, eddy current testing is also non-destructive and therefore suitable for testing components without destroying them. Alternatively, eddy current testing also allows 100% of products to be tested during production, thus ensuring the highest safety requirements.
We provide single and serial testing of your components in our Test Center – automated and manual.
Depending on the targeted penetration depth and resolution, it is necessary to select how the eddy current inspection shall be performed.
For eddy current testing, a simple cleaning of the workpiece is sufficient.
An inspector uses a probe that generates a magnetic field and scans the workpiece with this magnetic field. Induction creates a magnetic field in conductive parts of the workpiece. The interactions between the magnetic field of the probe and the workpiece are recorded and evaluated. Any anomalies can be examined in more detail.
Of course, the data is finally evaluated and comprehensively documented, both to prove a successful inspection and to record possible defects for reworking.
Eddy current testing is based on the physical phenomenon of electromagnetic induction. In an eddy current probe, an alternating current flows through a wire coil and generates an oscillating magnetic field. When the probe and its magnetic field are placed near a conductive material, such as a metal test specimen, a circular stream of electrons called an eddy current begins to move through the metal – like swirling water in a stream. This eddy current passing through the metal creates its own magnetic field, which interacts with the coil and its field through mutual inductance. Changes in metal thickness or defects such as cracks near the surface interrupt or change the amplitude and pattern of the eddy current and the resulting magnetic field. This affects in turn the movement of electrons in the coil by changing the electrical impedance of the coil. The eddy current inspection device records changes in impedance amplitude and phase angle that can be used by a trained inspector to detect changes in the test piece.
The eddy current density is highest near the surface of the component, so this is the area with the highest inspection resolution. The standard penetration depth is defined as the depth at which the eddy current density is 37% of its surface value, which in turn can be calculated from the test frequency and the magnetic permeability and conductivity of the test material.
Thus, variations in the conductivity of the test material, its magnetic permeability, the frequency of the alternating current pulses driving the coil, and the coil geometry affect the test sensitivity, resolution and penetration depth.
There are many factors that influence the potential of eddy current testing. Eddy currents moving into materials with higher conductivity values are more sensitive to surface defects, but penetrate less deeply into the material. Additionally the depth of penetration also depends on the test frequency. Higher test frequencies increase resolution near the surface but limit penetration depth, while lower test frequencies increase penetration depth. Larger coils test a larger volume of material from each position as the magnetic field penetrates deeper into the workpiece, while smaller coils are more sensitive to small defects. Variations in the permeability of a material create noise that can limit defect resolution due to larger background variations.
While conductivity and permeability are properties of the test material that are beyond the control of the inspector, the test frequency, coil type, and coil size can be selected according to the test requirements. For a given inspection, the resolution is determined by the probe type, while the detection capability is controlled by the material and device properties. For some inspections, multiple frequencies are run to optimize results. Several smaller probes, or probes, can also be used to achieve the best resolution and penetration depth required to detect all possible defects. It is always important to choose the right probe for each application to optimize inspection performance.
We provide single and serial testing of your components in our Test Center – automated and manual.
Frequently asked questions about Eddy Current Testing
Eddy current testing uses electronic probes that pass through various types of tubes or along the surfaces of materials to locate possible defects.
An eddy current is a current that runs in the opposite direction to the current induced by a probe into a conductive material.
Ein Wirbelstrom ist ein Strom, der entgegengesetzt zu dem von einer Sonde in ein leitendes Material eingeleiteten Strom verläuft.
The cost of an eddy current inspection varies significantly depending on the geometry of a workpiece and the desired penetration depth and resolution. Please contact us for more detailed information.
We provide non-destructive single and serial testing of your components in our Test Center in Burgwedel, Germany.
Copyright © 2024 VOGT NDT GmbH. All rights reserved.